Cost control

How to Check Teams Subscription? (Non-Technical Guide)

This guide shows how to check your Teams subscription using both quick user-level checks and the Microsoft 365 Admin Center. It focuses on what actually matters for startups: license visibility, usage gaps, and avoiding unnecessary spend.

4 min. read

Microsoft Teams license title banner with abstract background and user icon.
No headings found in content area

TL;DR

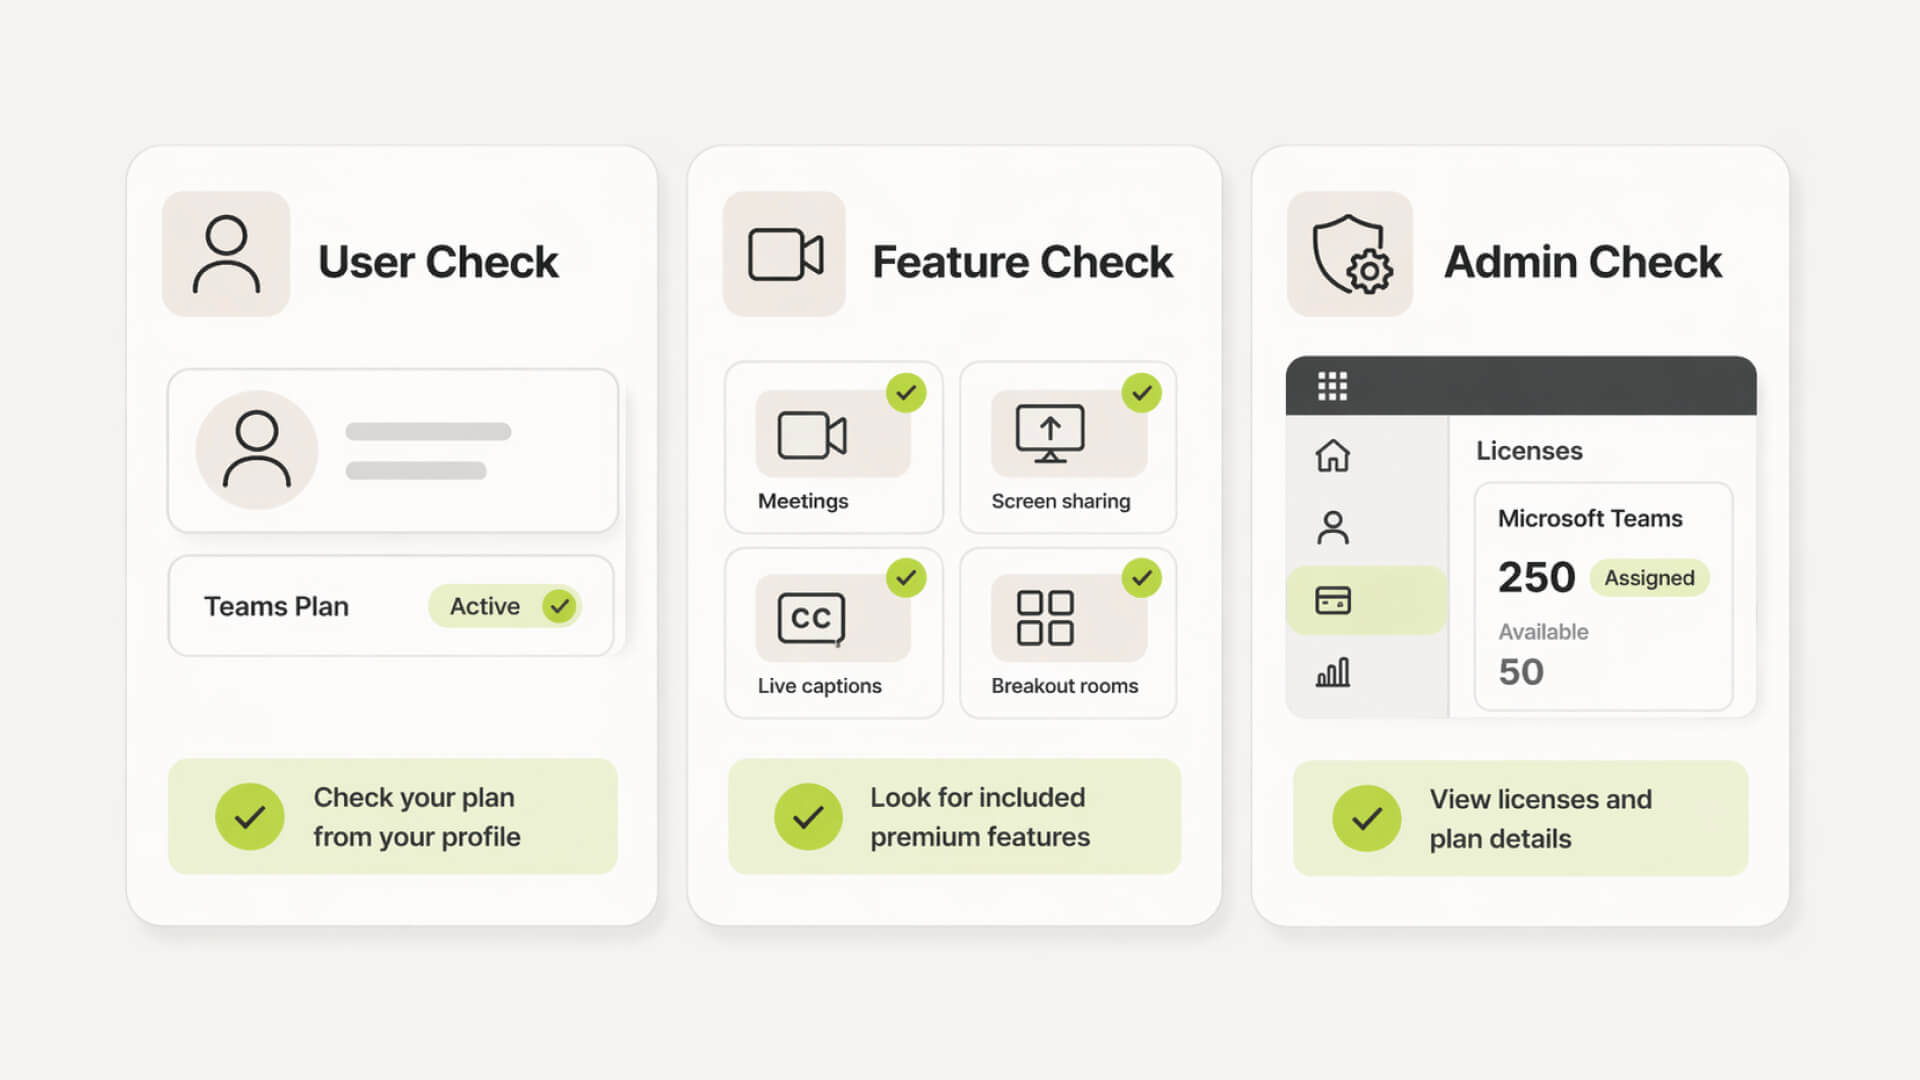
  • Fastest check (user-level)
    Open Teams, click your profile, and look for “Free” vs a work account. This gives a quick sanity check but won’t show the exact license type.
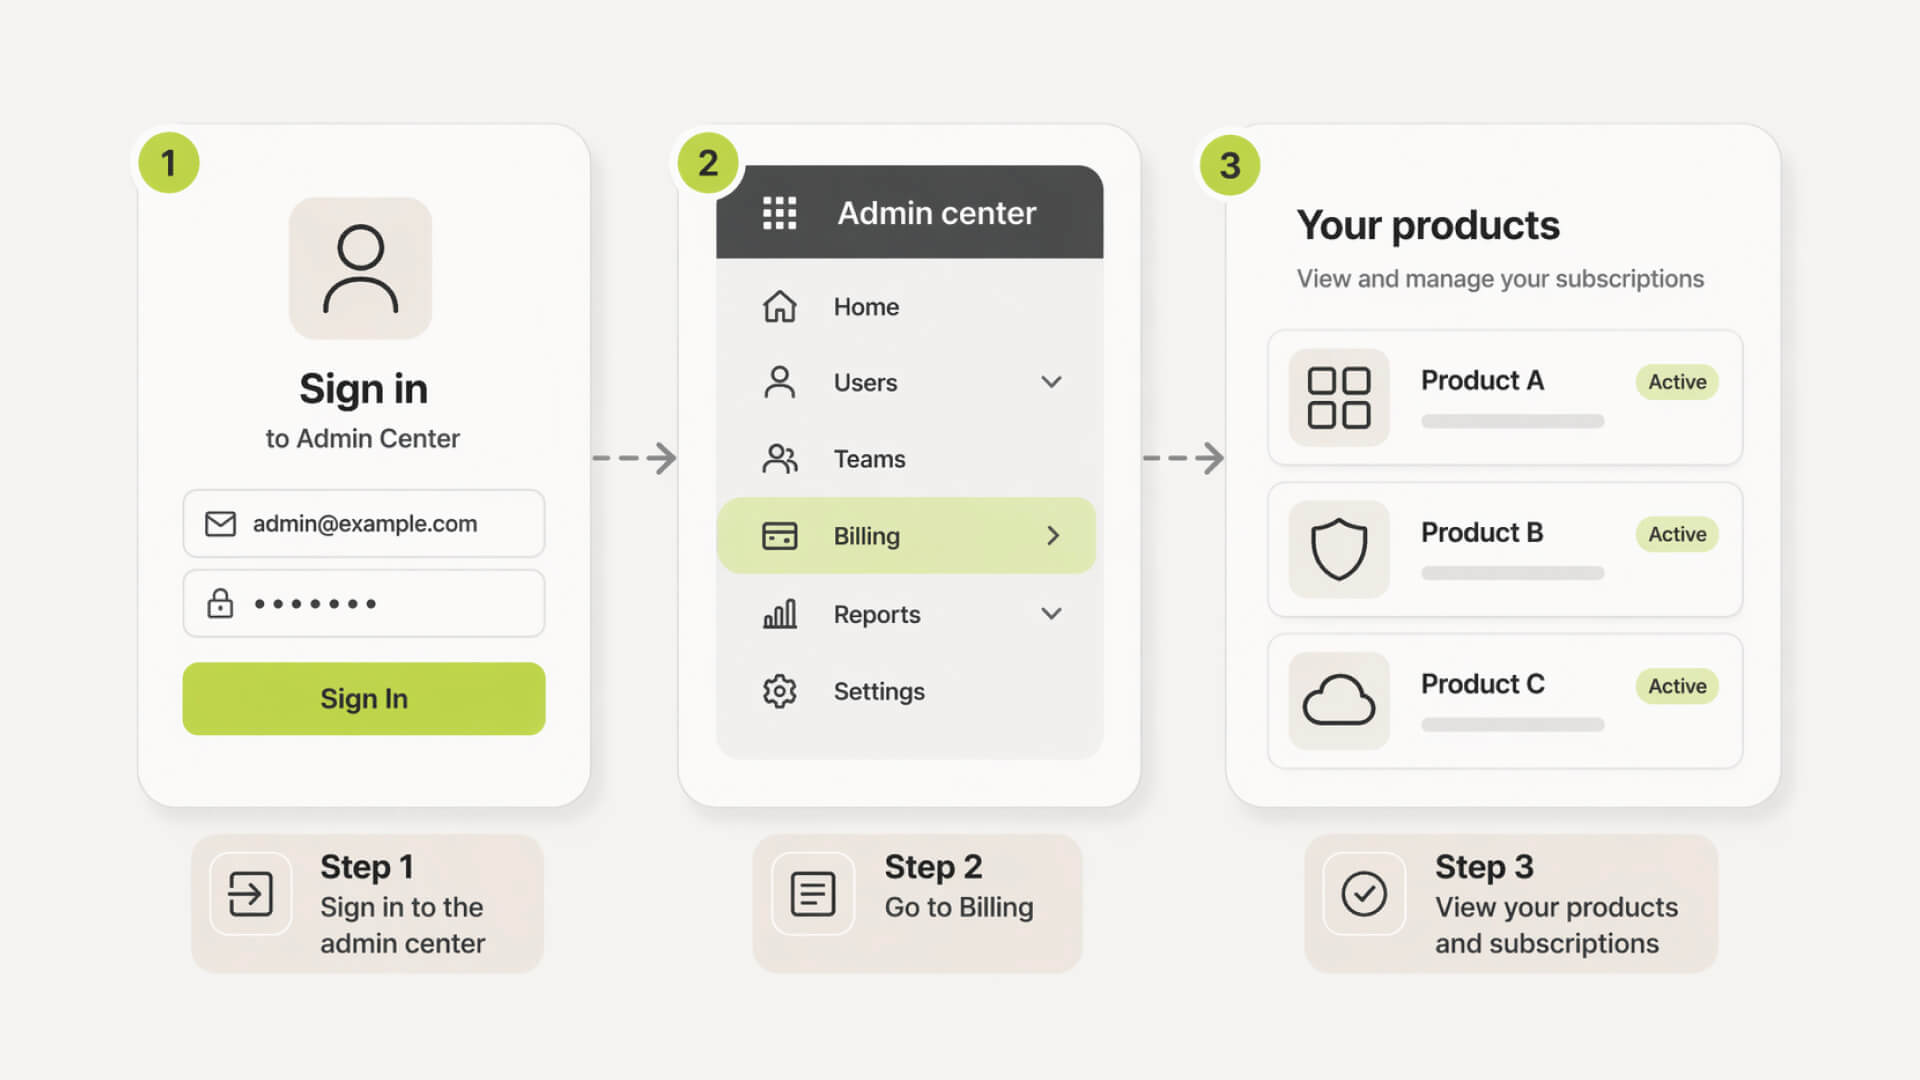
  • Premium detection
    If you see “Try Premium” or lack advanced meeting features, you’re not on Teams Premium. If those features work without prompts, you likely are.

  • Where cost leaks happen
    Unused licenses, duplicate assignments, or accounts tied to former employees. These gaps rarely show up unless you look for them, which is a common theme in startup SaaS waste statistics.

Where to find your Teams license details

To check a Microsoft Teams license, open the Microsoft 365 Admin Center → Billing → Your products, as described in how to check your Microsoft subscription. You’ll see subscription names, license counts, and status. Users can check their Teams profile for “Free” vs work account, but only admins see exact license details.

The 3 ways to check your Teams subscription

Comparison of three methods to check Teams subscription: user view, feature signals, and admin dashboard.

Quick check inside Teams (non-admin)

What to look for

  • Open Teams and click your profile (top-right)

  • Look under your name for “Microsoft Teams (free)” or similar

  • If no “Free” label and you’re on a work account, it’s likely paid via Microsoft 365

  • This confirms free vs paid, but not the exact plan.

Limitations of this method

  • No visibility into license name (e.g. Business Standard vs E3)

  • No license count or assignment data

  • No expiration or renewal details

  • Can be misleading in shared or multi-account setups

Track your SaaS spend

Get full visibility into subscriptions, owners, and upcoming renewals.

Join 100+ founders in line

Feature-based check: do you have Teams Premium?

Signals you have Premium

  • Meeting recap with AI-generated notes available

  • Advanced meeting controls (watermarking, templates, webinars)

  • No “Try Premium” prompts during usage

Signals you don’t

  • “Try Premium” or upgrade prompts visible

  • Missing advanced meeting or security features

  • Standard meeting experience only, as explained in Teams Premium licensing overview.

Admin-level check (the only accurate one)

Where to click in Microsoft 365 Admin Center

  • Go to admin.microsoft.com

  • Open Billing from the left sidebar

  • Select “Your products” or “Subscriptions”

What “Your products” actually shows

  • Exact subscription names (e.g. Teams Essentials, M365 Business)

  • Total vs assigned licenses

  • Subscription status (active, trial, expired)

  • Renewal or expiration timing

Step-by-step: check Microsoft Teams license in admin center

Step-by-step flow showing navigation from admin dashboard to subscription list view.

Step 1: Access Microsoft 365 Admin Center

Go to admin.microsoft.com and sign in with an admin account. If billing isn’t visible, you likely don’t have the required role.

Step 2: Navigate to Billing → Your products

In the left sidebar, open Billing and select “Your products,” where all active subscriptions are listed, consistent with Microsoft’s official admin documentation.

Step 3: Identify Teams-related subscriptions

Look for plans like Microsoft 365 Business Standard, Teams Essentials, or Teams Premium. Teams is often bundled, so it may not appear as a standalone product.

Step 4: Check assigned vs available licenses

Open a subscription to see how many licenses are assigned versus unused. This is where you quickly spot over-purchasing, a key issue discussed in the $50k silent burn.

Step 5: Spot expiration or renewal dates

Review the subscription status and next billing date. Trials, expired plans, or upcoming renewals are clearly labeled here.

Still tracking this manually?

Subsight automatically maps your tools, owners, and renewal timelines in one place.

Join 100+ founders in line

The startup contrast: enterprise vs startup reality

Enterprise complexity

  • Multiple overlapping licenses across departments

  • Dedicated IT managing assignments and renewals

  • Heavy reliance on documentation and internal processes

  • Low visibility for non-technical stakeholders

Startup reality

  • One person informally managing everything

  • Licenses added reactively as the team grows

  • Little tracking of who actually uses what

  • Costs accumulate quietly without review

What most guides miss: license count ≠ actual usage

Visualization showing total licenses split between assigned and unused seats.

The hidden problem: “we have 40 seats, 28 active users”

Admin Center shows what you’ve purchased and assigned, not who actually uses Teams day to day. The gap between assigned and active users is where waste builds up, a concept explored in what is SaaS management.

Where shadow IT creeps in

Teams rarely exists alone. Employees adopt adjacent tools, duplicate apps, or external workspaces. This doesn’t appear in your Microsoft view, but it still adds to spend.

Why this directly impacts burn rate

You pay for licenses, not actual usage. Unused seats, duplicate tools, and inactive accounts quietly increase monthly costs without clear signals.

The startup contrast: Microsoft view vs real usage

Microsoft view

  • Total licenses purchased

  • Assigned vs unassigned seats

  • Subscription status and billing cycle

Startup reality

  • Who actually logs in and uses Teams

  • Overlap with Slack, Zoom, or other tools

  • Licenses tied to inactive or former employees

  • Spend that looks justified but isn’t

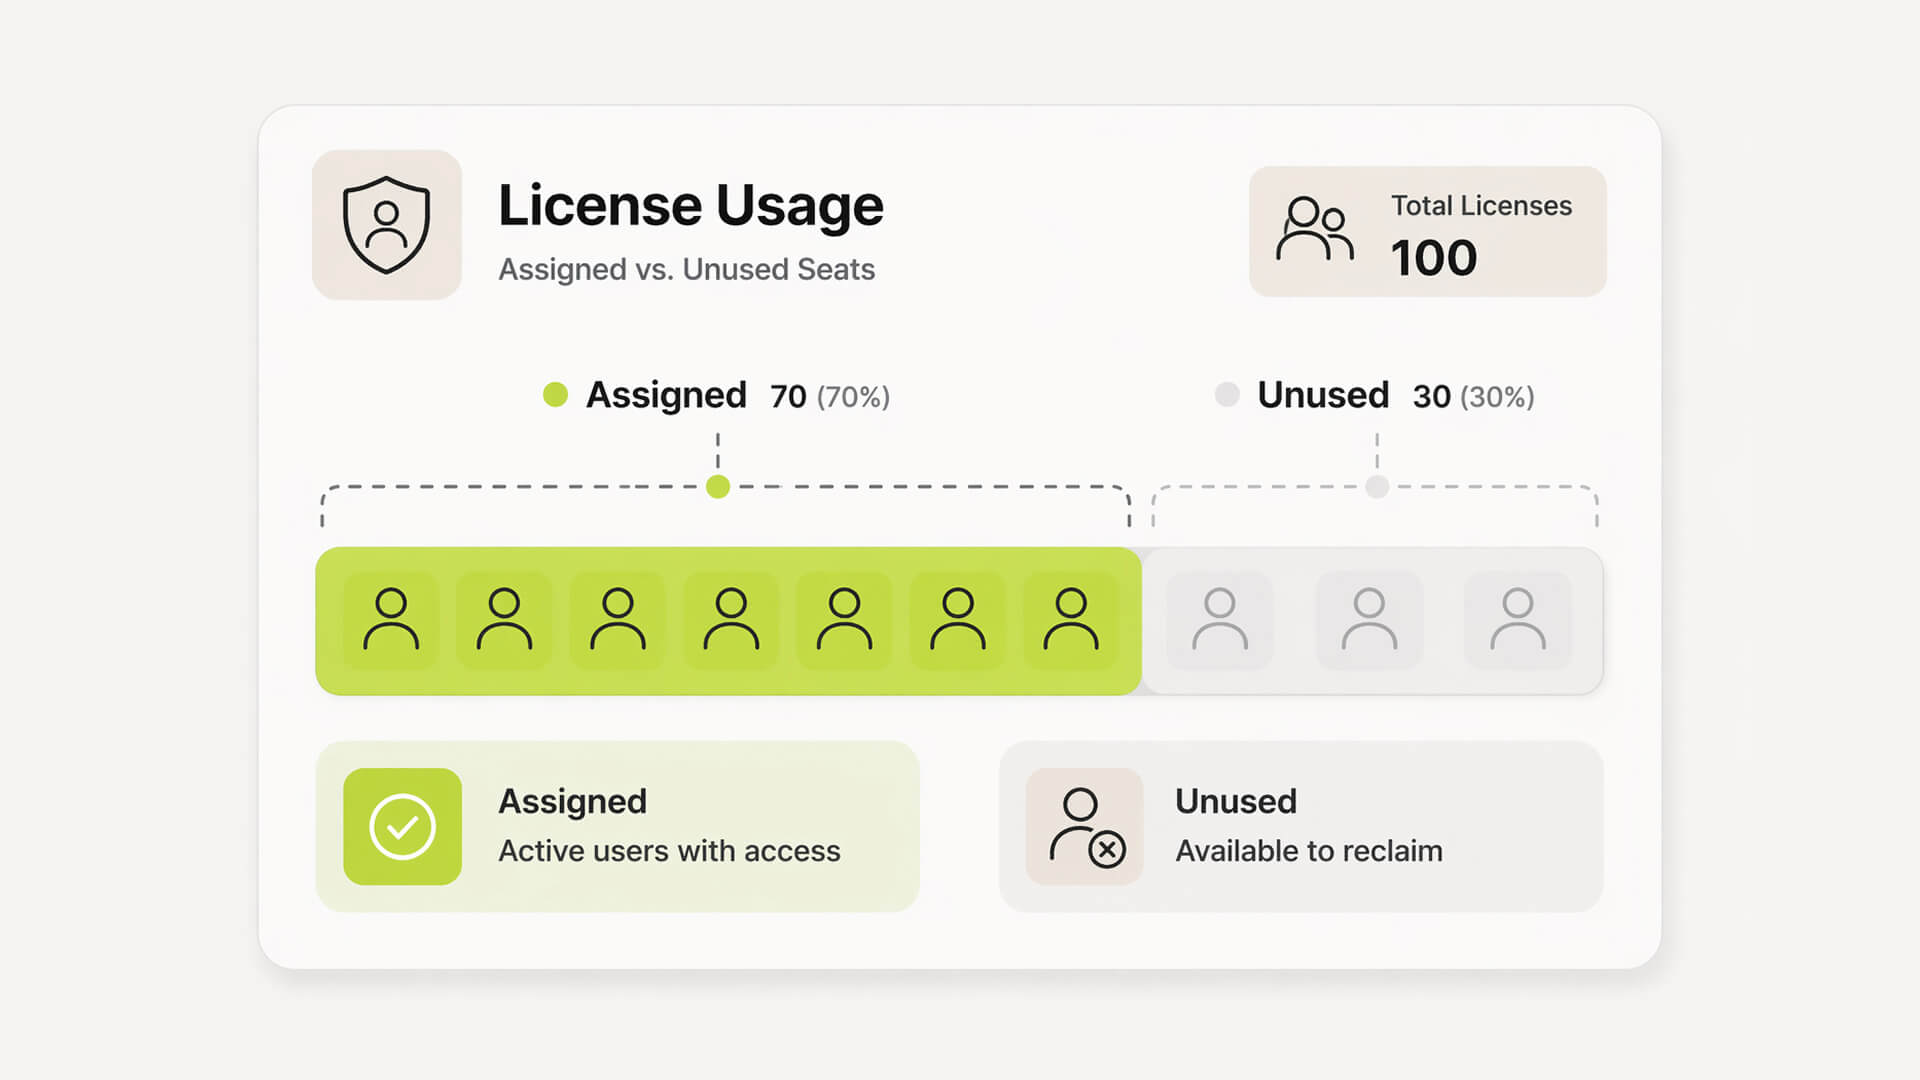
Pro Tip: If you’re only checking whether you “have Teams,” you’re asking the wrong question. Compare licenses purchased against actual usage. That gap is where waste hides and often adds up to €1k–€5k per year unnoticed.

Take control of your SaaS stack

Stop guessing. Know exactly what you’re paying for and who owns it.

Join 100+ founders in line

Frequently asked questions

How do I check Microsoft Teams license as a user?

Where do I see assigned licenses in Microsoft 365?

How can I tell if I have Teams Premium?

How do I check Microsoft subscriptions?

How to track Microsoft Teams usage?

No headings found in content area

Find hidden SaaS subscriptions

Track every tool, owner, and renewal in one place. No spreadsheets. No surprise renewals.

Join 100+ founders in line

Professional portrait of Petras Nargela, Founder of Subsight, against a neutral background.

Petras Nargela

Petras is the Founder of Subsight and a veteran entrepreneur with over 10+ years of experience building and scaling digital ventures. Over the past decade, he has co-founded several successful companies that generate 7-figure annual revenue, including a Shopify app studio and a digital agency. Having managed the complex financial stacks of multiple high-growth businesses, he built Subsight to solve the "SaaS leakage" problem he experienced firsthand. He now helps B2B teams turn software chaos into a strategic, automated advantage.

Get started

Affordable subscription tracking for teams

Track, manage, and cancel subscriptions in minutes. Join the waitlist today to secure 40% off your first 3 months.

Get started

Affordable subscription tracking for teams

Track, manage, and cancel subscriptions in minutes. Join the waitlist today to secure 40% off your first 3 months.

Get started

Affordable subscription tracking for teams

Track, manage, and cancel subscriptions in minutes. Join the waitlist today to secure 40% off your first 3 months.